What's up ,
I'm gone for a while, but I'm coming back here today to share something with you that I learned last week. How to create and publish an extension in vscode!
In these last days I decided to venture out and I will tell you what I learned and how you can create your own extension.

Why an extension in vscode?
In microsoft's marketplace you will find thousands of extensions that have the main objective to help and improve your productivity while you code.
In a certain situation at work, I needed to create an extension that would generate some files in automatic so that it would increase the productivity of the development team.
Something simple and objective, brings benefits such as:
- Team all aligned with the project structure.
- Incentive to create tests (since the extension automatically creates the test file and a very simple test).
- Increases productivity, now it is not necessary to waste time creating the entire zero structure

Starting...
Well let's create an extension that generates an index file, tests and styles (with styled components). I will use as a base the project I developed on tests in react, you can read the full article on How to create tests on the front-end in ReactJs.
But before creating your extension you need to have vscode, node, git and have a react project running with styled components , In the vscode documentation you have some detailed functions in case you need to find out about a specific function.
Our extension will generate the following automatic codes:
index.js
import React from 'react'
import { Container } from './styled'

export default function NameComponent() {
  return (
    <Container>
      <strong>Hello stranger, NameComponent!</strong>
    </Container>
  )
}
styled.js
import styled from 'styled-components'

export const Container = styled.div`
  text-align: center;
`
test.js
import React from 'react'
import { mount } from 'enzyme'
import NameComponent from './'

it('Should mount component', () => {
  const wrap = mount(<NameComponent />)
  expect(wrap.find('strong').at(0).text()).toEqual(
    'Hello stranger, NameComponent!'
  )
})
An important note!
The name NameComponent, will actually be the name of the component you want to generate!
With open vscode you will need to install Yeoman a project generator.
npm install -g yo generator-code
yo code
And you will have a vision similar to this:
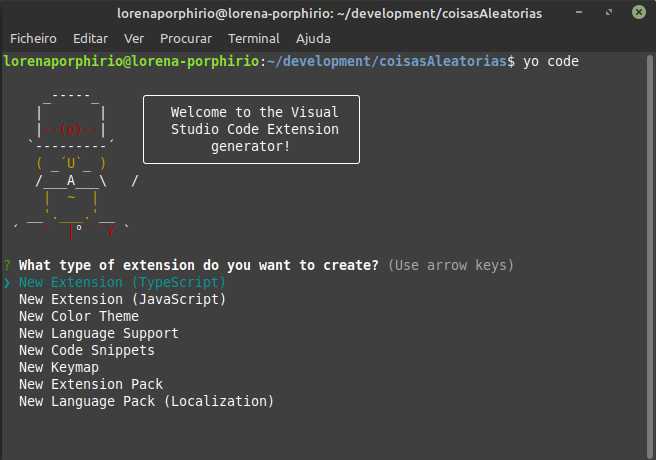
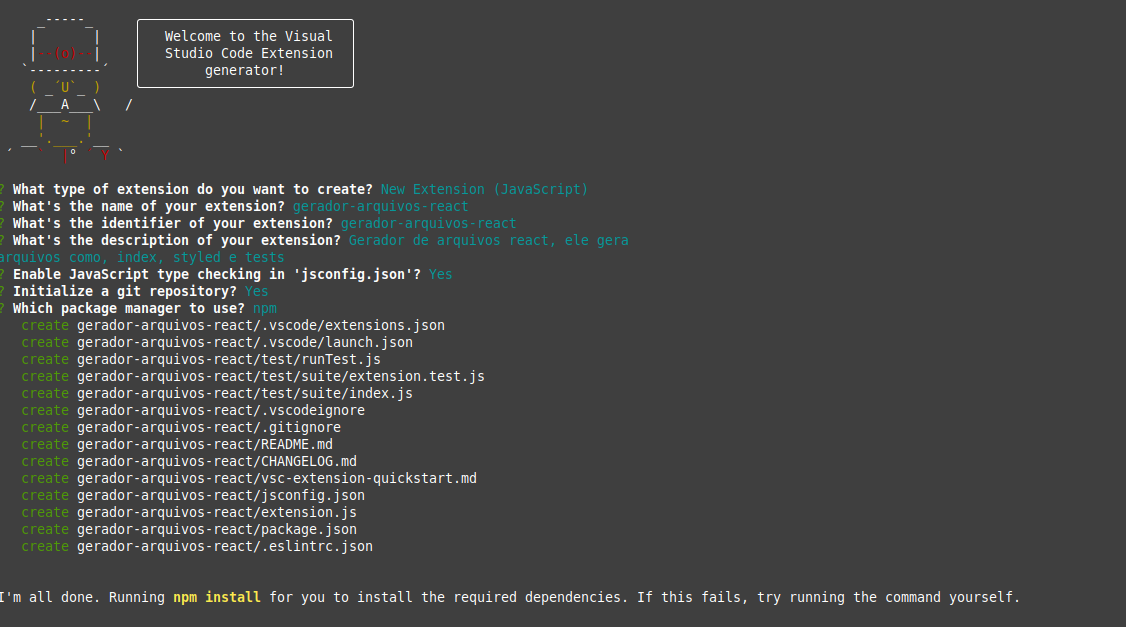
Then just access your project that you just created. And we have the following project structure.
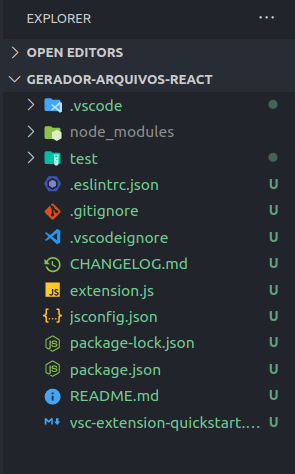
The extension.js file is where the magic happens!
Well let's see the magic happening!
Press F5 this will run your application in debug mode and open a development host for the extension.
And run Hello Wold in the command palette.

Right on the side will show a Hello world message!
Now we are going to add an item to the menu when we press the right mouse button on any packege.
For that you need to open packege.json, there and where you configure all parameters, commands for how your extension will be called, it can be by command line, Menus among others, here you can see the complete list.
...
"activationEvents": [
	"onCommand:extension.gerador-arquivos-react"
],
"main": "./extension.js",
"contributes": {
		"commands": [
			{
				"command": "extension.gerador-arquivos-react",
				"title": "Gerador de arquivos React"
			}
		],
		"menus": {
				"explorer/context": [
					{
						"when": "true",
						"command": "extension.gerador-arquivos-react",
						"group": "navigation"
					}
				],
				"commandPalette": [
					{
						"command": "extension.gerador-arquivos-react",
						"when": "editorHasSelection"
					}
				]
			}
	},
...
extension.js
const vscode = require('vscode')

function activate(context) {
  console.log(
    'Congratulations, your extension "gerador-arquivos-react" is now active!'
  )
  let disposable = vscode.commands.registerCommand(
    'extension.gerador-arquivos-react',
    function () {
      vscode.window.showInformationMessage(
        'Hello World from gerador-arquivos-react!'
      )
    }
  )

  context.subscriptions.push(disposable)
}
exports.activate = activate

function deactivate() {}

module.exports = {
  activate,
  deactivate,
}
And you will have a view similar to this:
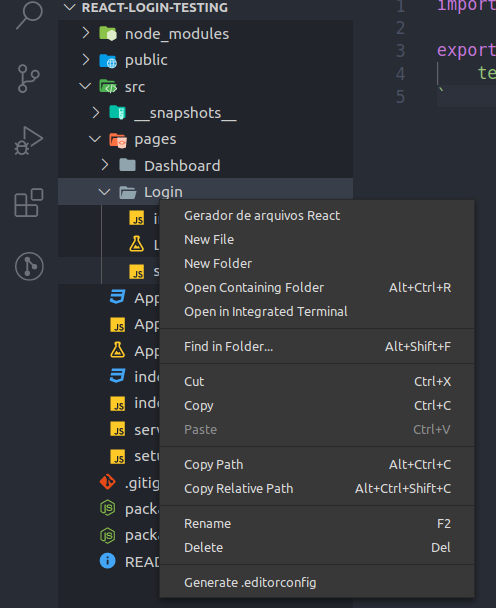
Now let's create a folder called templates and add the index, styled and test files!
module.exports = () =>
  `import styled from 'styled-components'

export const Container = styled.div${'`'}
    text-align: center;
${'`'}
`
module.exports = nameComponent =>
  `import React from "react";
import { Container } from "./styled"

export default function ${nameComponent}() {
  return (
    <Container>
      <strong>Hello stranger, ${nameComponent}!</strong>
    </Container>
  );
}
`
module.exports = nameComponent =>
  `import React from "react";
import { mount } from "enzyme";
import ${nameComponent} from "./";

it("Should mount component", () => {
    const wrap = mount(<${nameComponent} />);
    expect(wrap.find("strong").at(0).text()).toEqual("Hello stranger, ${nameComponent}!");
});
`
Files created!
Now, let's capture the path where the file will be generated and get the folder name
let disposable = vscode.commands.registerCommand(
  'extension.gerador-arquivos-react',
  function (e) {
    const filePath = e.path // getFilePath
    const nameFolder = filePath.substring(filePath.lastIndexOf('/') + 1) //GetNameFolder
    vscode.window.showInformationMessage(
      'Hello World from gerador-arquivos-react!'
    )
  }
)
Now we will import the generated files in the template folder and create a Map of key and value and finally generate our files.
The final file looks like this:
const vscode = require('vscode')
const fs = require('fs')
const path = require('path')

const templateStyled = require('./templates/styled')
const templateIndex = require('./templates')
const templateTest = require('./templates/test')

function activate(context) {
  let disposable = vscode.commands.registerCommand(
    'extension.gerador-arquivos-react',
    function (e) {
      const filePath = e.path
      const nameFolder = filePath.substring(filePath.lastIndexOf('/') + 1)
      const mockTemplates = setMocks(nameFolder)

      for (let [key, value] of mockTemplates) {
        let objectCreate = value()
        createFile(filePath, objectCreate)
      }
      vscode.window.showInformationMessage('Done!')
    }
  )

  context.subscriptions.push(disposable)
}

function setMocks(nameFolder) {
  let mockTemplates = new Map()
  mockTemplates.set('Styled', () => {
    const fileName = 'styled.js'
    const mockFunction = templateStyled()
    return { fileName, mockFunction }
  })
  mockTemplates.set('Index', () => {
    const fileName = 'index.js'
    const mockFunction = templateIndex(nameFolder)
    return { fileName, mockFunction }
  })
  mockTemplates.set('Test', () => {
    const fileName = `${nameFolder}.test.js`
    const mockFunction = templateTest(nameFolder)
    return { fileName, mockFunction }
  })

  return mockTemplates
}

function createFile(pathFile, objectCreate) {
  fs.writeFile(
    path.join(`${pathFile}/`, `${objectCreate.fileName}`),
    objectCreate.mockFunction,
    async err => {
      if (err) {
        return vscode.window.showErrorMessage('Opss.. Error')
      }
    }
  )
}

exports.activate = activate

function deactivate() {}

module.exports = {
  activate,
  deactivate,
}
DONE!
Now and just test, create a folder and execute the extension you will have a result similar to this:
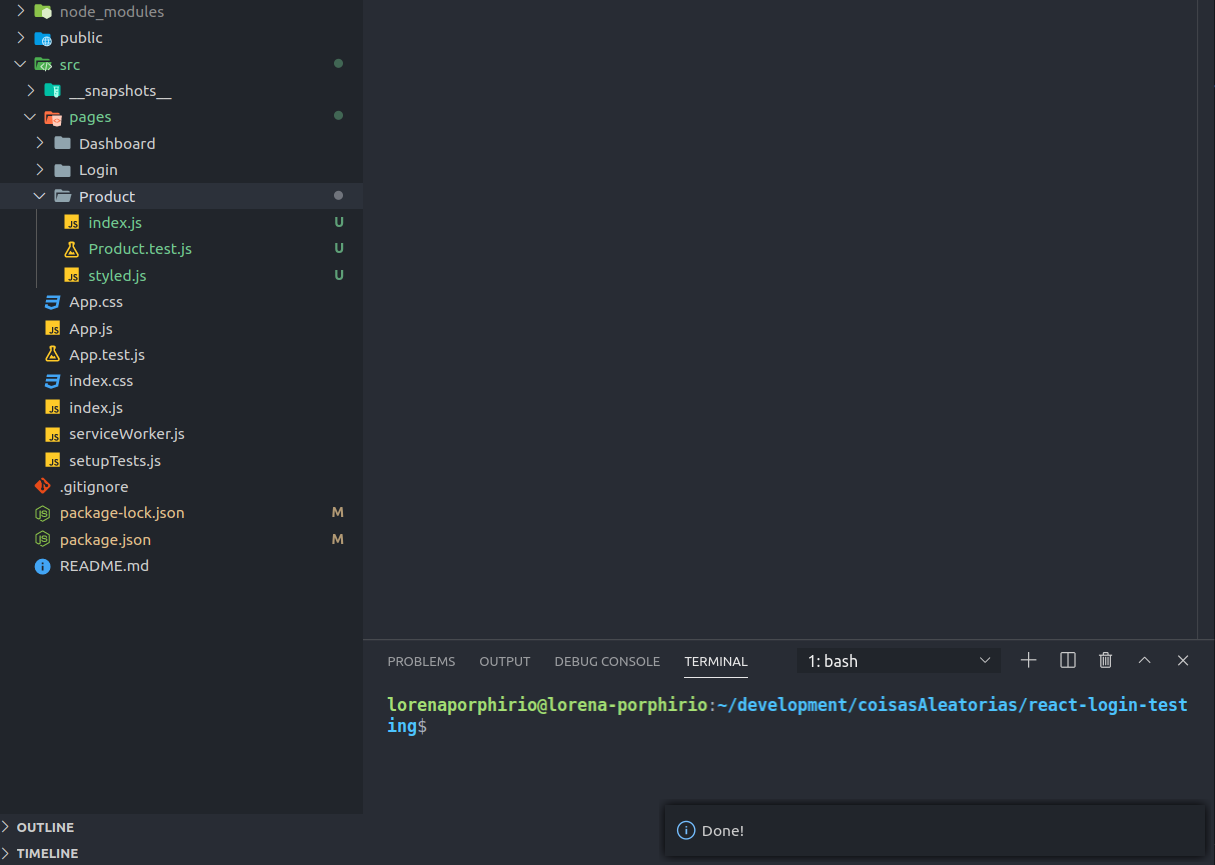
Wonderful right?

You can find the source code here
Now we are going to generate a packege and share it with friends, but first you need to define the publisher in package.json and change the project readme:
npm install -g vsce
vsce package
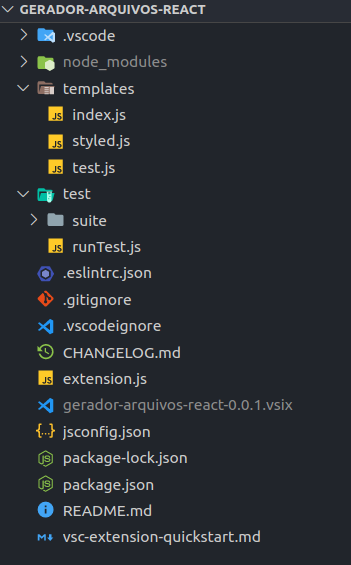
It will generate a package at the root of the project:
To install locally and just run:
code --install-extension my-extension-0.0.1.vsix.
Tell me what you found here in the comments!
Hope this helps,
To the next.

